Purpose of Pritunl VPN
Data security and privacy has become more important for the business. While there are many ways to protect data, one of the most effective is to use a Virtual Private Network (VPN), such as Pritunl Client and Server VPN.
Pritunl Client and Server VPN is a powerful VPN solution that suits individuals and businesses.
How to install pritunl ?
Pritunl has well updated document in there website below.
https://docs.pritunl.com/docs/
In Enterprise Edition it supports enabling SSO for easy managing user access and Pritunl already have setup steps for google,azure,slack,okta and most of the major sso platforms.
Single Sign On with AWS SSO(IAM Identity Center)
Configuration Of IAM Identity Center to setup SAML 2.0
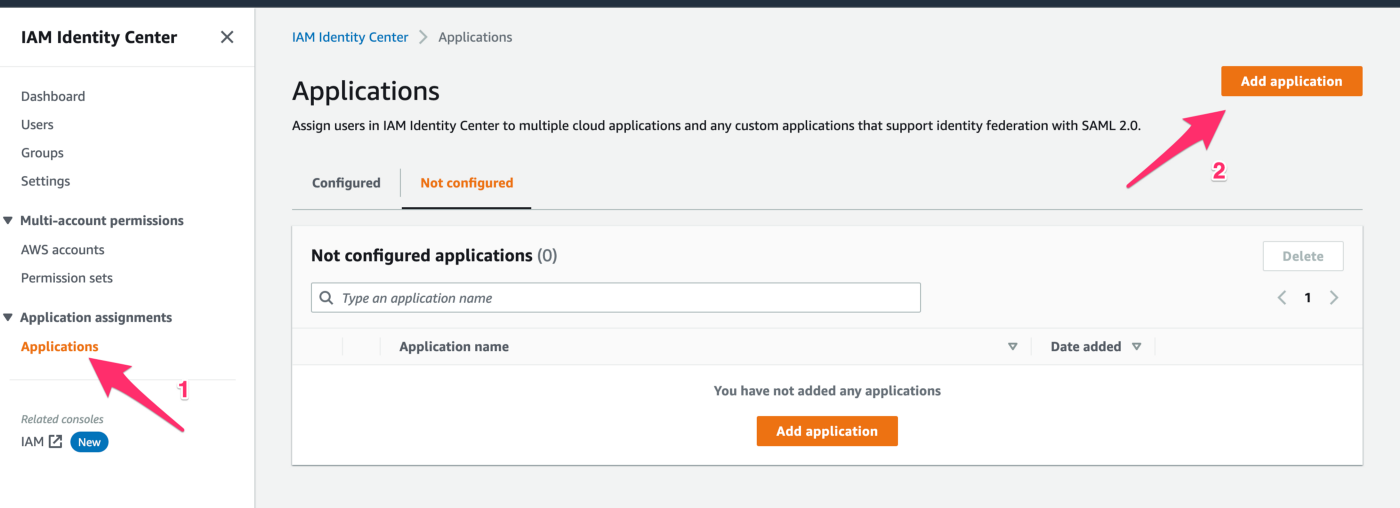
- Open the IAM Identity Center console.
- Choose Applications.
- Choose Add application.
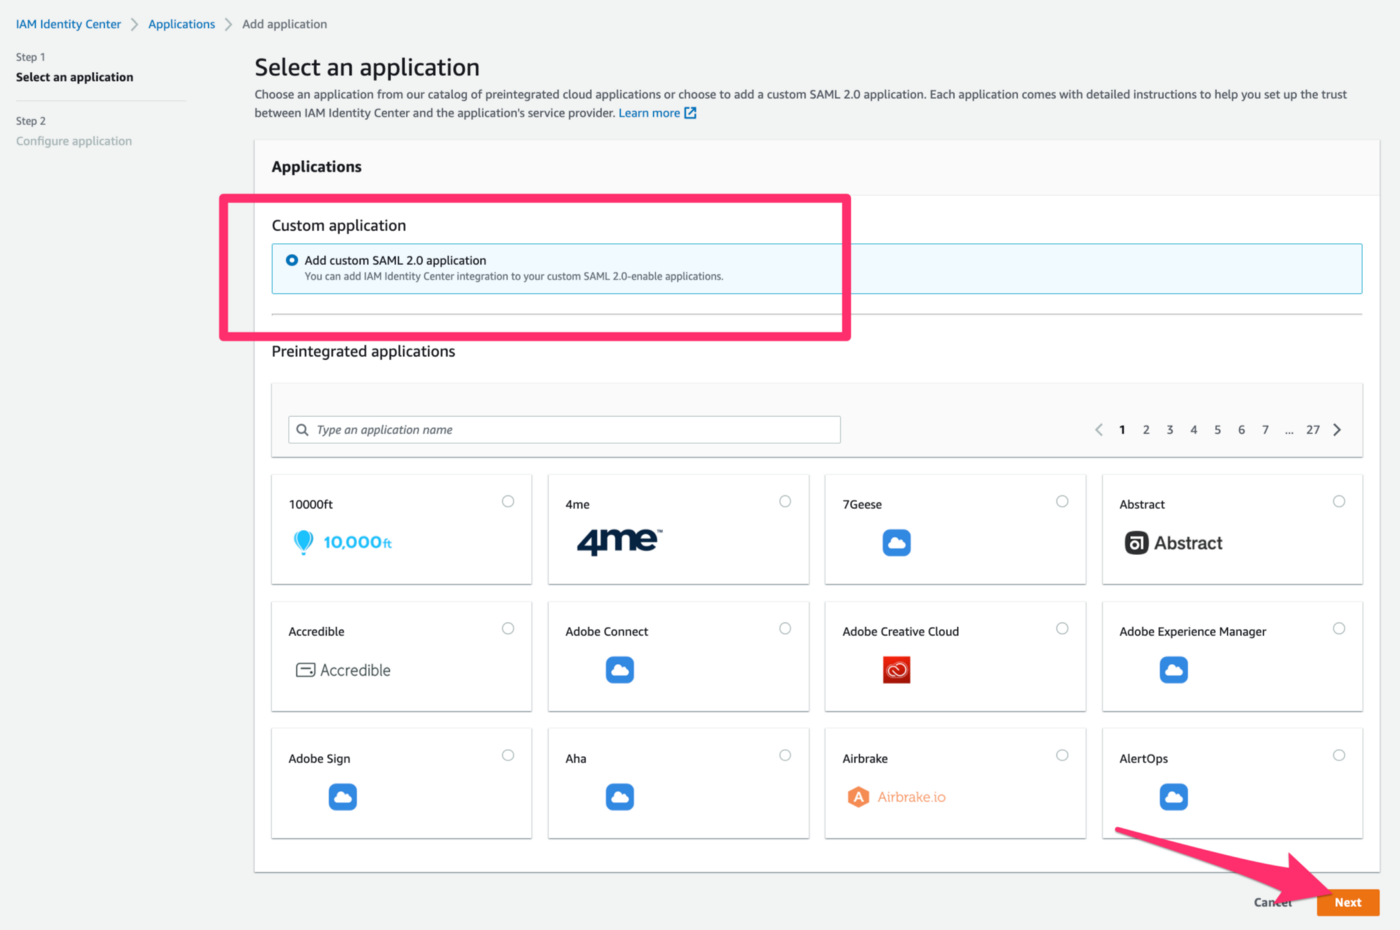
4. On the Select an application page, choose Add custom SAML 2.0 application. Then, choose Next.
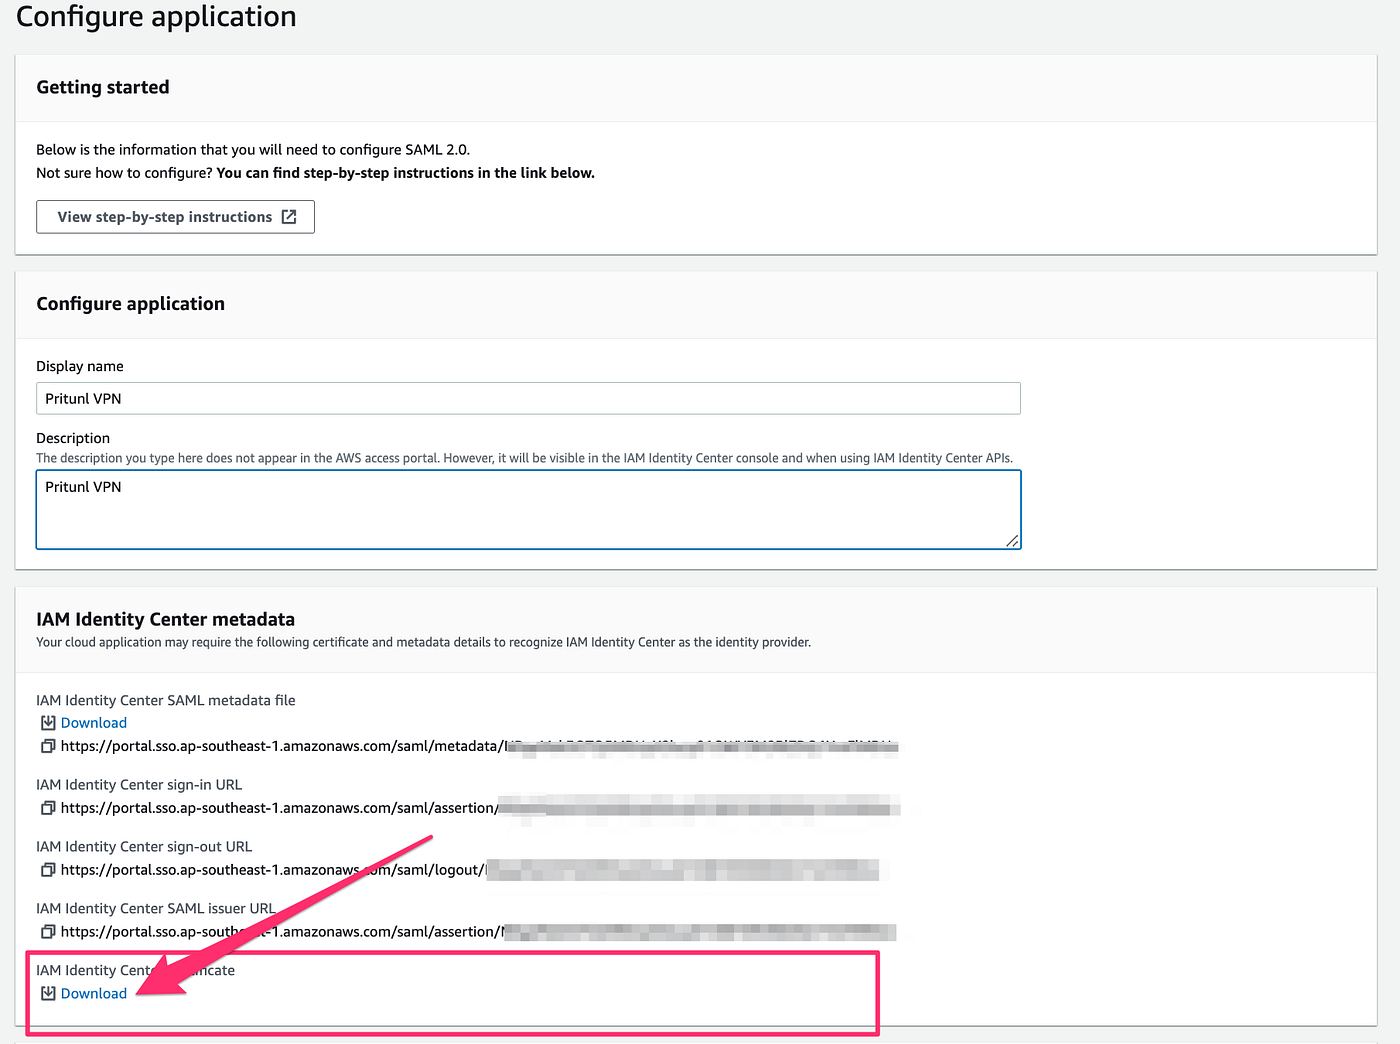
5. On the Configure application page, under Configure application, enter a Display name for the application as Pritunl VPN(Can be any name).
6. Under IAM Identity Center Certificate, Click Download to get the Certificate file.
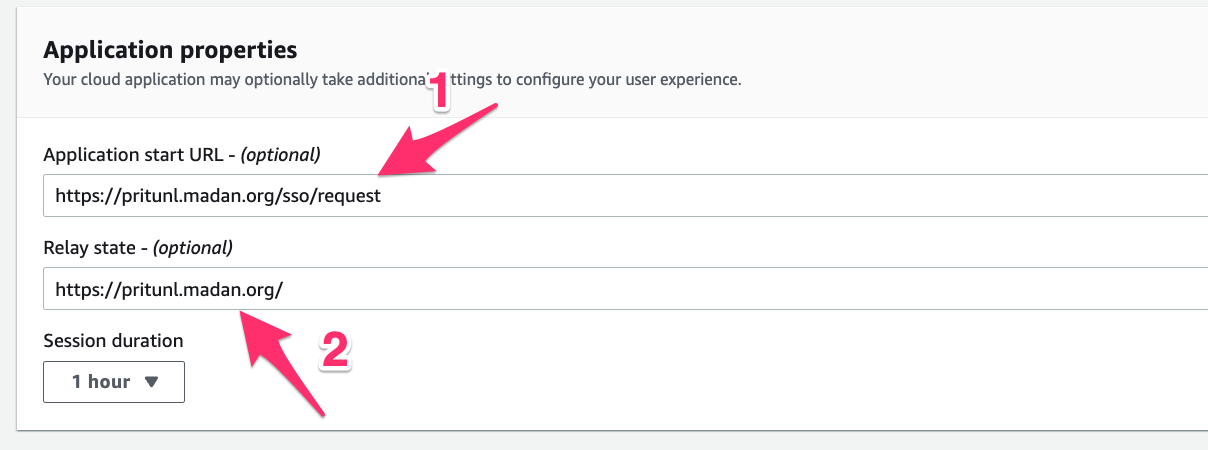
7. Under Application Properties, provide Application start URL as below
Application start URL → https://<your domain name>/sso/request
8. Under Application metadata, choose Manually type your metadata values. Then, provide the Application ACS URL and Application SAML audience as below and click submit.
below parameters are important and don’t changes the values.
Application ACS URL → https://auth.pritunl.com/v1/callback/saml
Application SAML Audience → pritunl

9. Click Edit attribute mappings, and map values as below and save changes
Subject → ${user:subject}-> transient
email → ${user:email} -> basic
username → ${user:email} -> basic


Enable SAML Single Sign-On in Pritunl
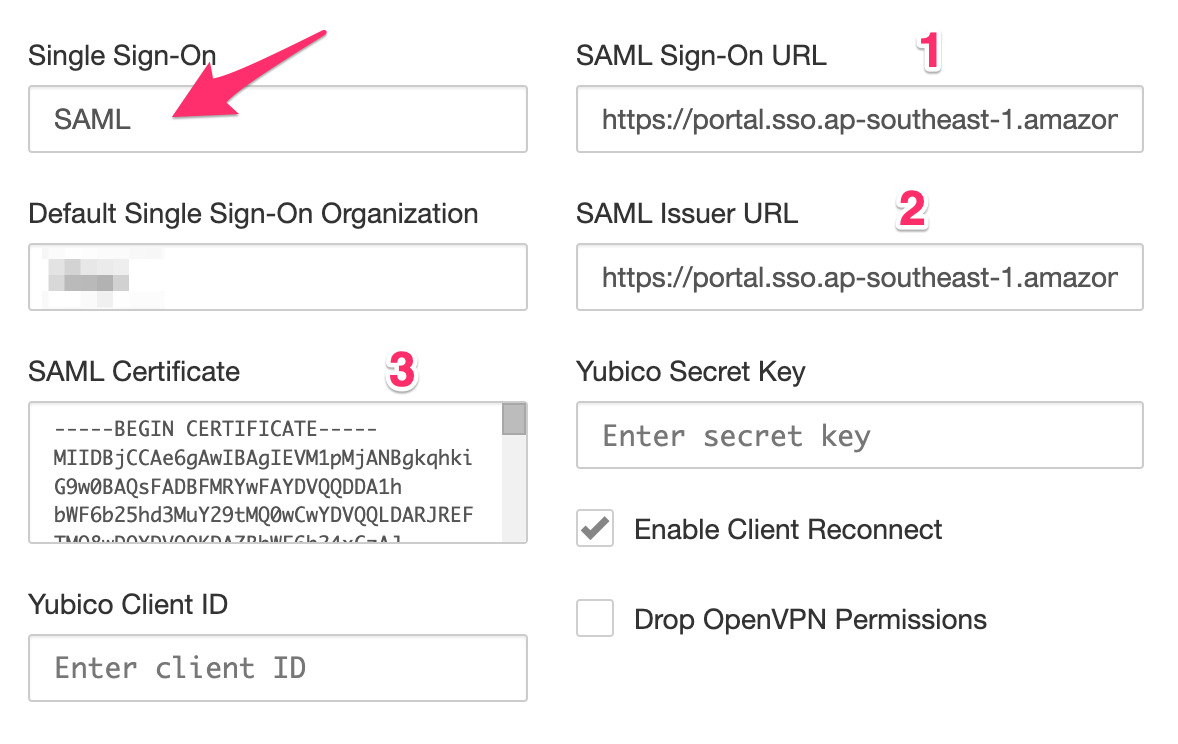
Once the application on AWS SSO created, SSO can be enabled in the pritunl web console. Open the settings dialog in the web console and select SAML as the Single Sign-On mode. Then using the parameters on the AWS SSO page and provide the details as below
SAML Sign-On URL → Identity Provider Single Sign-On URL
SAML Issuer URL → Identity Provider Issuer
SAML Certificate with the X.509 Certificate → One which we downloaded at the SSO application creation in AWS
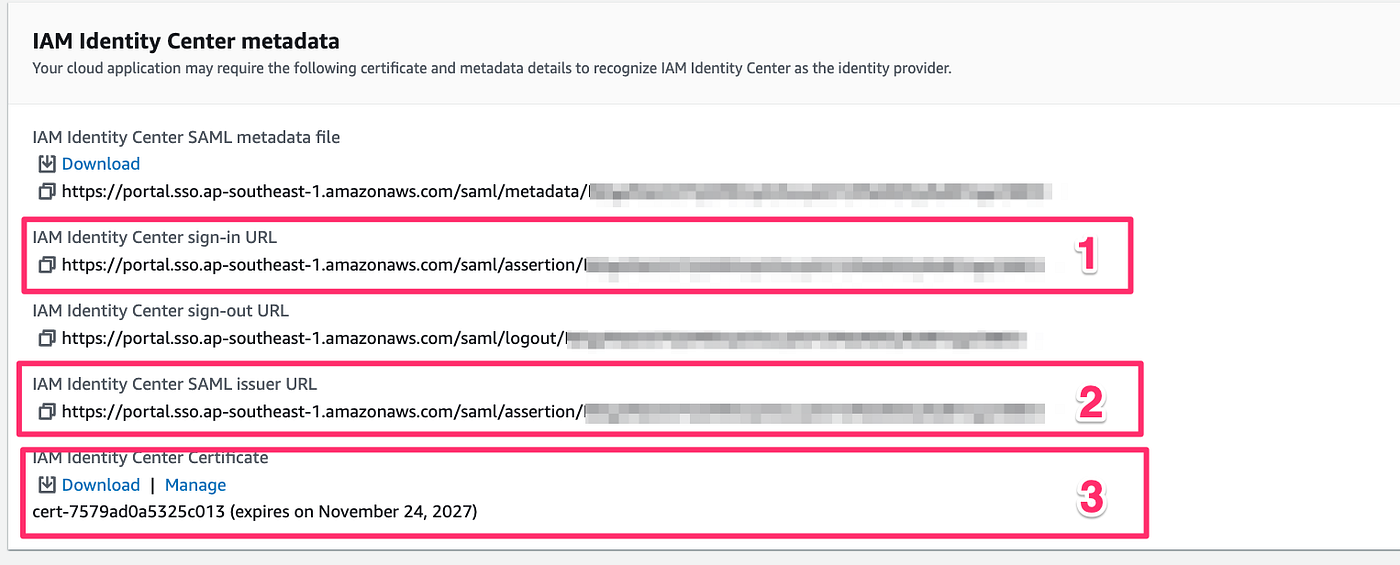
Copy and paste the value in Pritunl Web consle.
Authenticating Users
Once SAML single sign-on is enabled a button will appear at the login screen to authenticate with SAML or New application will Show in the AWS SSO Login page.
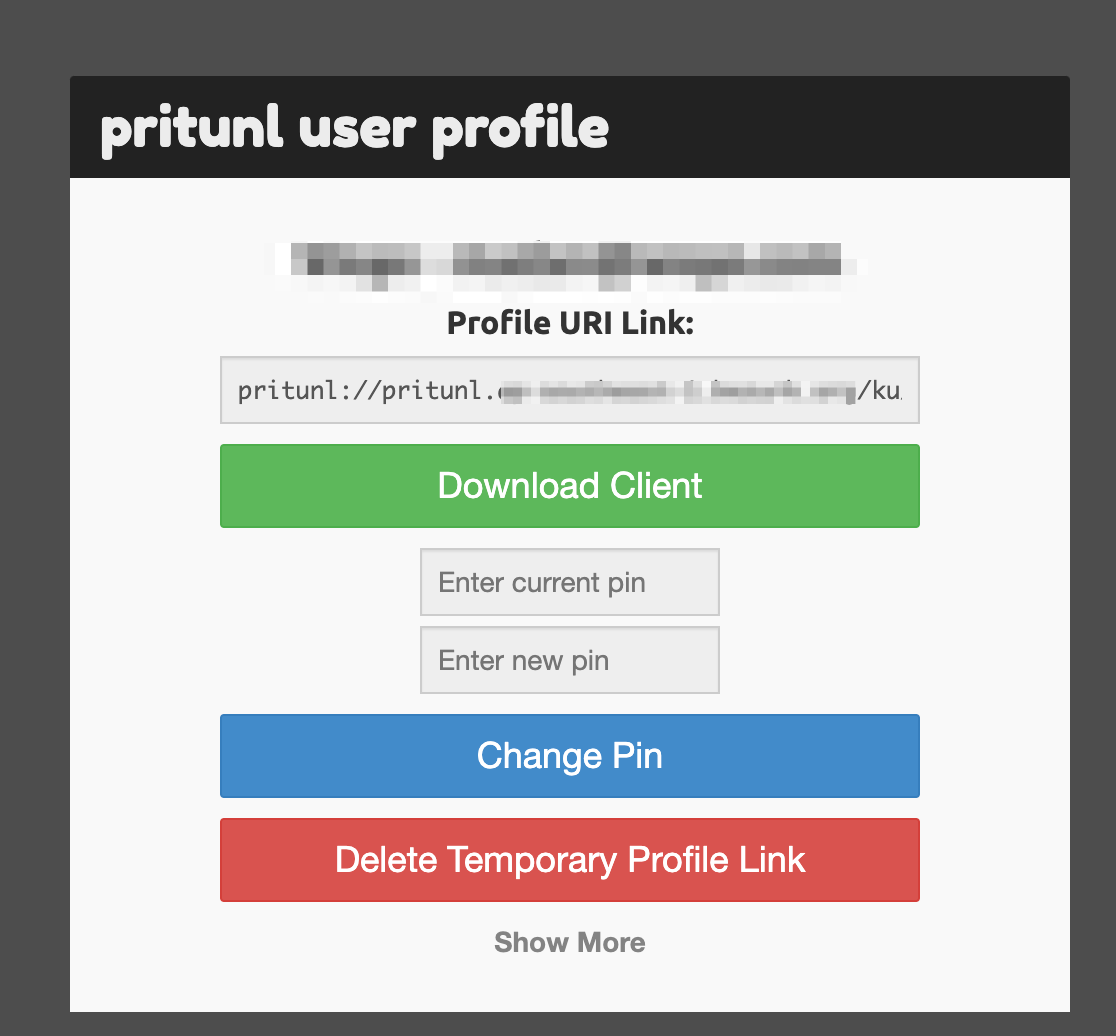
When a user selects Sign in with SAML they will be directed to the SAML provider to authenticate. Once authenticated they will directed to the profile page where they can download their vpn profiles.
Happy Securing !!!!!!!
View Comments